How to create a Blog in BOWWE in less than 1h | Tutorial

BOWWE University

How to set up a Blog in less than 1h in BOWWE?

It doesn't matter if you run a business or personal website; if you want to attract a ton of new visitors to your site, you should think about starting a blog. This doesn't mean you have to start writing articles - a blog is a great place to share any format of content: articles, slideshows, images, infographics, videos, webinars and more - anything that has value to you and your site visitors can be published on a blog! 


This tutorial will show you how to set up a Blog in BOWWE and add it to your site in less than 60 minutes. Let's dive into it!
A.  Create a Blog subpage and add it to your site.

1
Log in to BOWWE and open the design of the page to which you want to add a blog.
2
Open the PAGES tab in the right side panel.
3
Check if you have a Blog subpage in Menu Pages or Standalone Pages.
If you use one of the BOWWE Templates, you may already have a blog subpage added and configured; if so, skip the following subsections and go straight to step B. Edit the Blog subpage using the most essential widgets.
4
If you don't have a blog subpage, click the green ADD NEW PAGE button.
5
In the Select page type field, select Blank page.
Thanks to the portfolio, it is easy to show what a given company offers, not only in terms of the service, but also how it will be performed.
6
In the Page Name field, type "Blog”.
7
Go to the Layout tab.
In the Select Page Layout section, you can choose which elements are arranged in a specific layout you want your blog's main subpage to consist of. We recommend layouts with a Top Panel and a Side Column on the right or left.
8
Go to the Basic SEO tab.
Here you can specify the critical SEO parameters of your blog subpage: Meta Title, Meta Description and the most important keywords. (If you don't yet know what should be here, you can always return to this step in the future).
9
Click SAVE.
The blog subpage has been added to your site. If you want to place it in the site's main menu, drag the Blog tab from the Standalone Pages and drop it into the Menu Pages.

B.  Edit the Blog subpage with the most essential widgets.

1
Hover over the Blog tab and click the Edit button (marked with a pencil icon).
2
You will now go to the Blog subpage inside the Creator.

Here you can edit and customize everything the way you want; (if you use a template with an already prepared Blog subpage, you can edit its appearance or go to step C. Add the first blog post).

3
Depending on the page layout you chose in step A-7, your blog subpage will be divided into several main sections.
Place an Area widget in each to manage the elements on the page more easily later.

C.  Create and configure your first blog post.

1
From the right side panel, select BLOG (located between PAGES and STYLE).
2
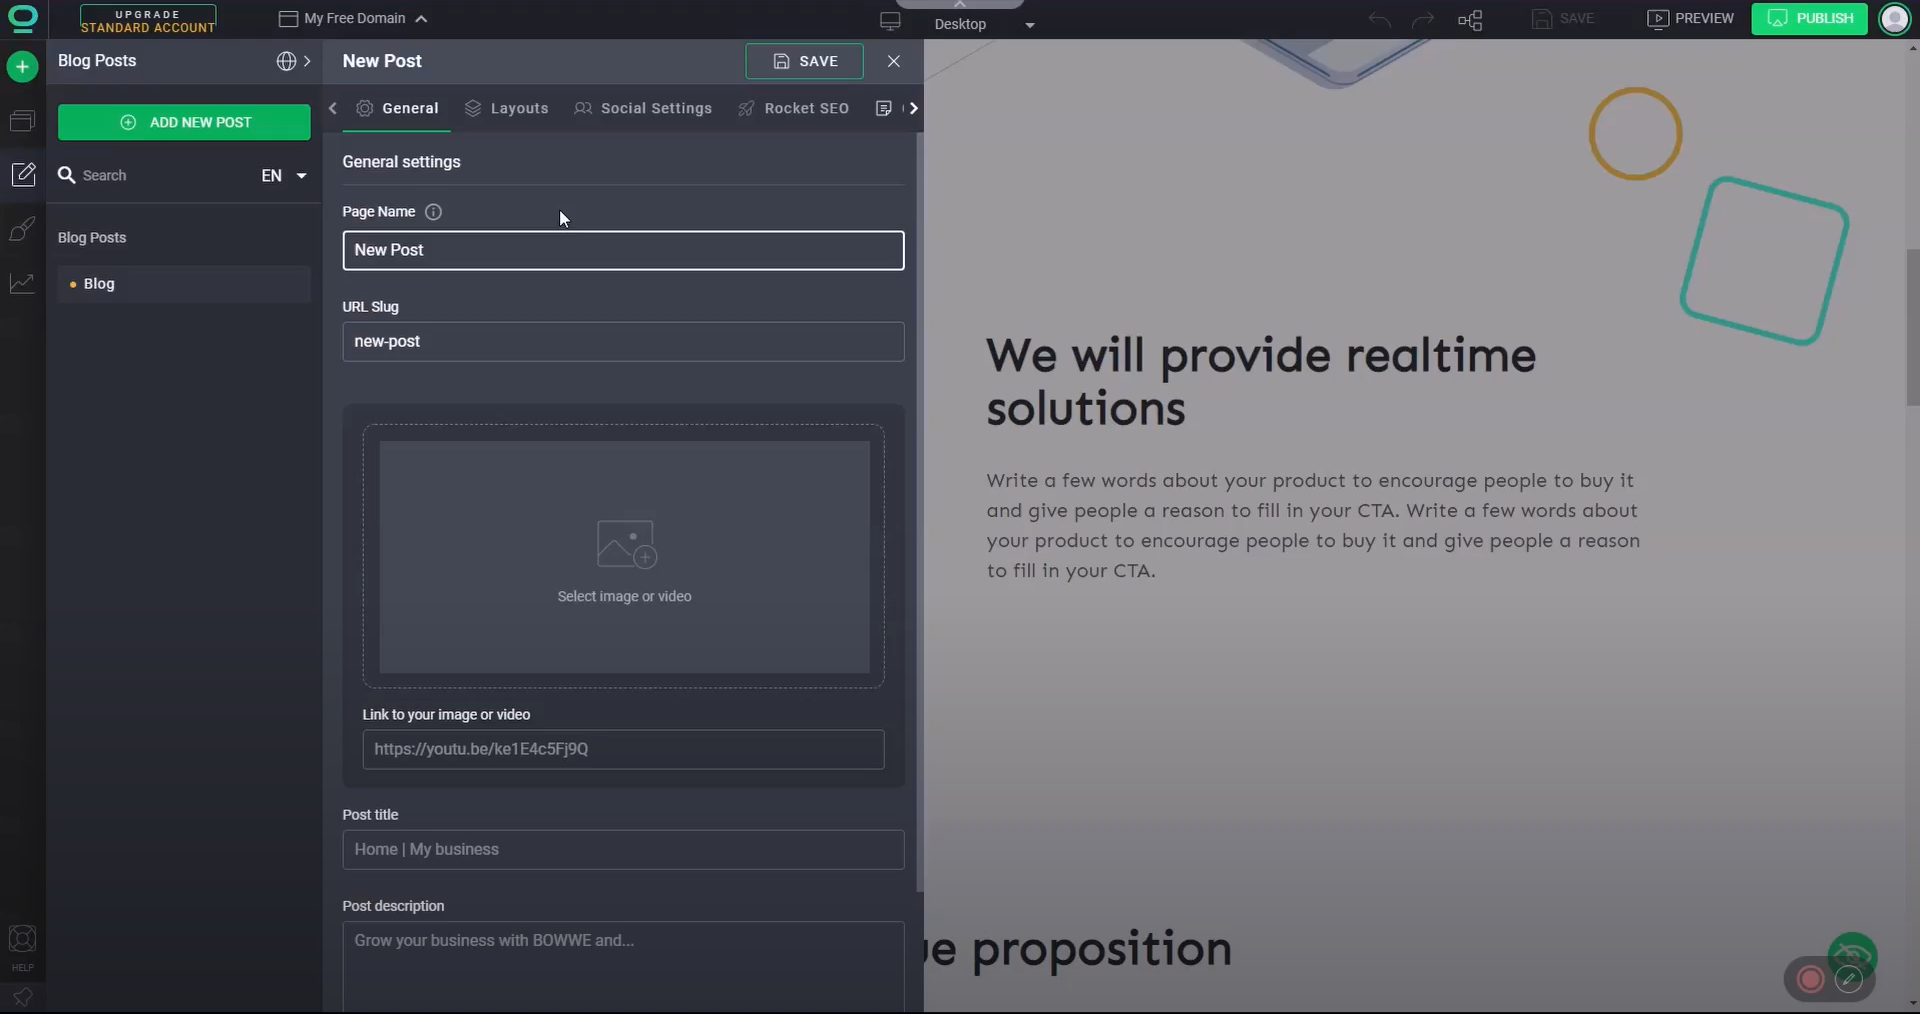
Click the green ADD NEW POST button.
3
In the General tab, specify:
  • The name of the page (it will only be visible to you in the BOWWE Builder),
  • URL (at this address, your post will be available online),
  • Image or video (an individual graphic thumbnail for each post, visible to visitors when they enter the main blog subpage),
  • Post title (your Meta title, under which your site will appear in search engines),
  • Description (your Meta description, visible to users in a search engine).
4
Under the Layout tab, specify:
  • Blog post layout
  • Composition
5
Go to the Categories tab.

In it, you can choose which categories you want to assign your new post to. You can also add new categories.

  • Click NEW CATEGORY to add a new category (specify its Name and URL).
  • Check the green checkbox to assign a post to one of the available categories.
6
Click SAVE.
Your first blog post is now available; you can add specific content!

D.  Add content to your first blog post.

1
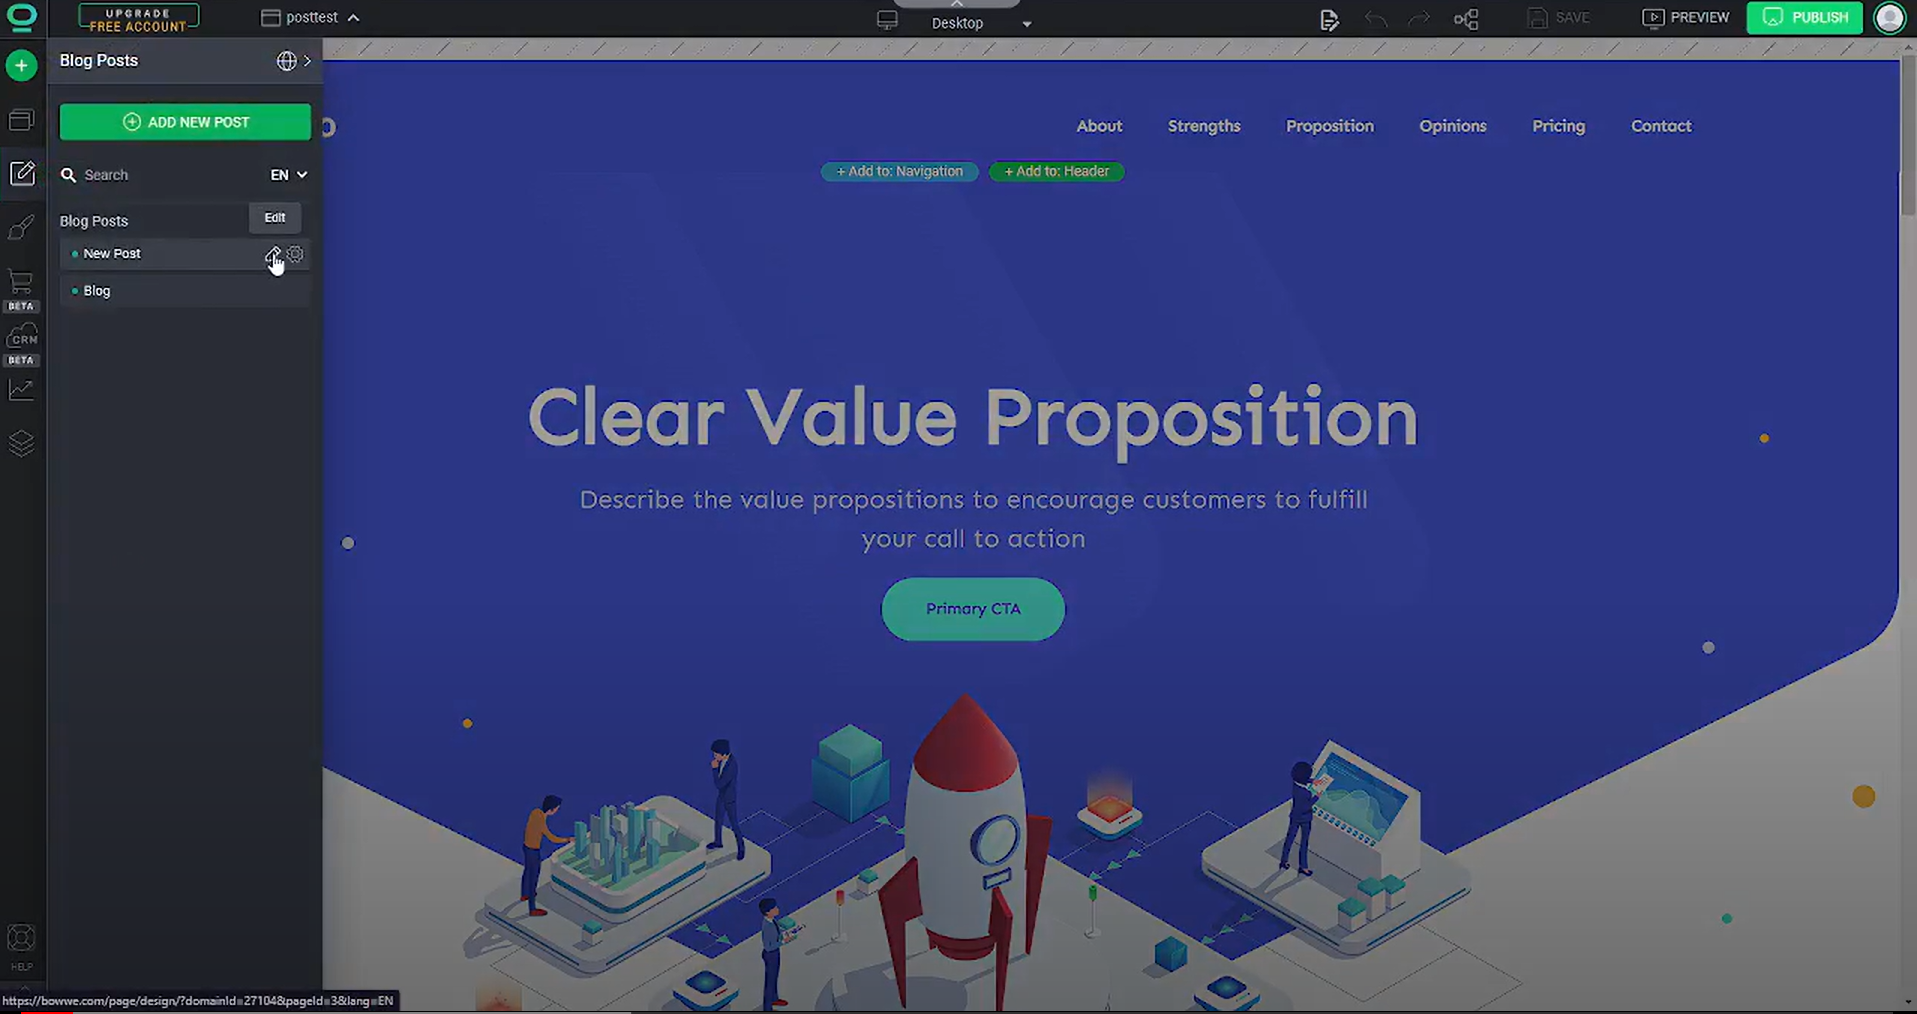
Hover over the newly added Blog post tab and click the Edit button, marked with a pencil icon.
2
You will now go to the Blog post in the wizard, where you can edit it and add your content.
3
From the right side panel containing available widgets, expand the BLOG tab.

There you will find widgets dedicated to blog posts.
4
Now add the most necessary widgets to your blog post.
The video below will show you an example of a blog article layout you can create.

Congratulations!

You already know how to create a blog and connect it to your website!

You just set up a blog. What's next?

It's time for you to focus on creating and promoting content. Articles, presentations with slides, infographics, webinars - you can publish anything on your blog that is useful to the people you want to attract.
Do you want your blog to grow very fast? Be sure to check out what amateur blogger mistakes you must avoid!

Dedicated to you

Didn't find the answer?

No matter what your problem is. We are here to help you find a solution